Lockers
- Jason Vance
- Lee Holmes
At the beginning of the school year, student locker assignments are typically removed, locker combinations are moved to the next sequence, and lockers are then re-assigned to students for the coming year. The instructions below will walk you through these processes in Infinite Campus.
The information provided below is not all inclusive, but addresses the most common situations at CCS. For more details on the tools described here, visit the Campus Community and search for Lockers.
End Date Current Locker Assignments
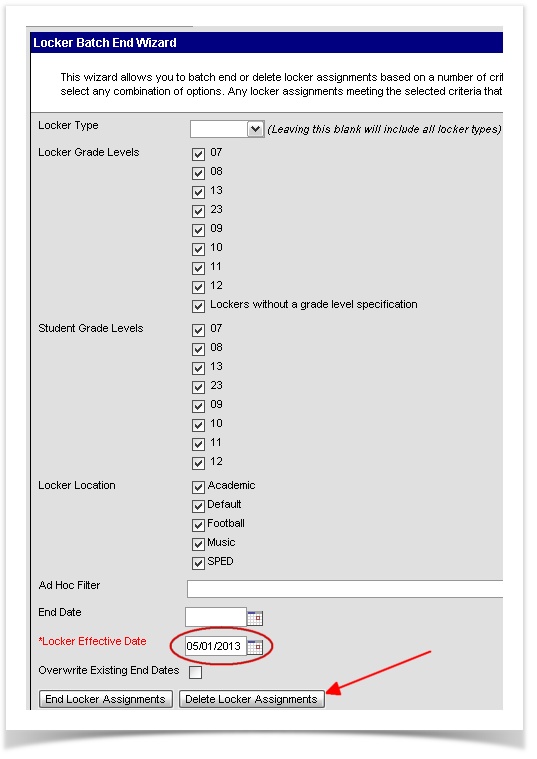
Use the Locker Batch End Wizard to end-date locker assignments from last year.
Path: System Administration > Lockers > Locker Batch End Wizard
- Check all boxes (Locker Grade Levels, Student Grade Levels, and Locker Locations)
- Enter an effective date
 Make sure to use a date from LAST school year (i.e. May 1)
- High Schools - If we have rolled over to the new year (usually in late July) you may have difficulty removing locker assignments for graduates, because they do not have a record in the database for the next school year, and you cannot edit previous year data, including lockers after the rollover. If this is the case, please contact Campus support by sending us a ticket and we'll be happy to assist.
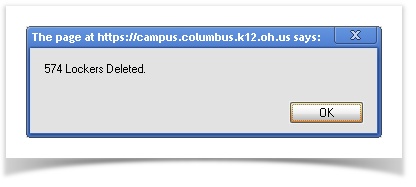
- Click Delete Locker Assignments
Rotate Combinations to the next sequence
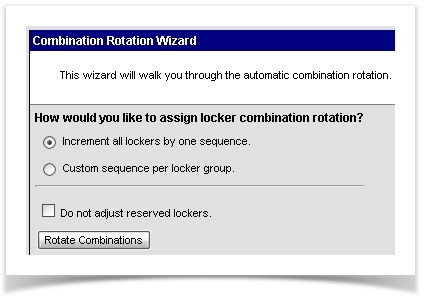
Use the Combination Rotation Wizard to automatically rotate the locker combinations to the next sequence.
Path: System Administration > Lockers > Combination Rotation Wizard
- Choose Increment all lockers by one sequence
- Click Rotate Combinations
Mass Assign Lockers
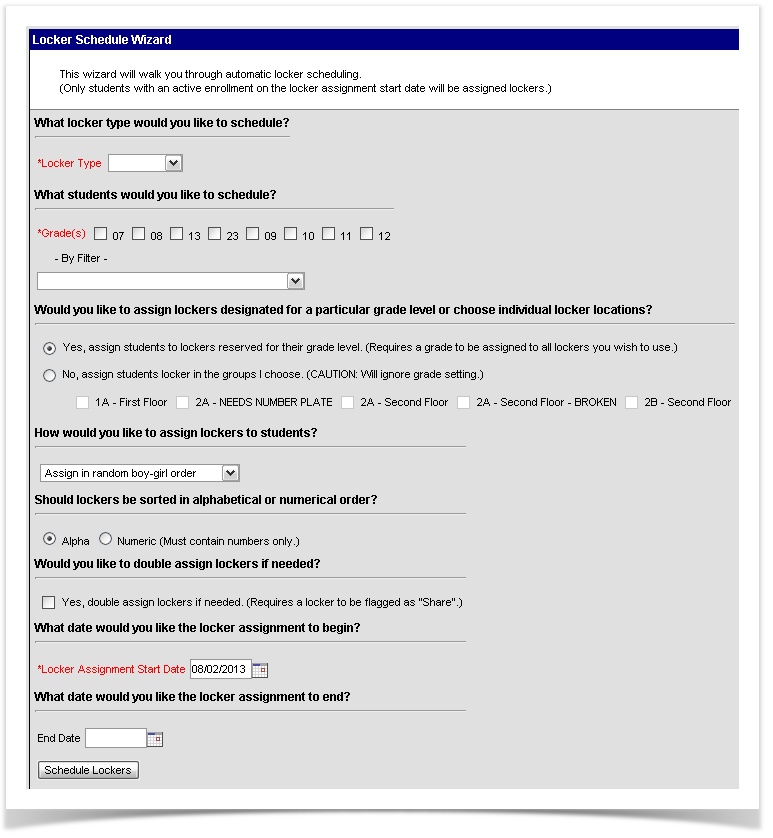
Path: System Administration > Lockers > Locker Schedule Wizard
- The Locker Schedule Wizard provides the school with the ability of assigning lockers to students en masse.
- Students must be actively enrolled in the school selected in the Campus toolbar.
Using the Locker Schedule Wizard
- Select which locker Type to schedule from the dropdown list.
- Select the grade levels for which to assign lockers. All grade levels may be selected at one time. An ad hoc filter can also be used to select the students.
- Select the method that will be used to assign students to particular lockers.
- Determine how lockers should be assigned to students by selecting an option from the dropdown list.
- Select how lockers should be assigned, either alphabetically or numerically.
- Check the Yes box if you wish to double-assign lockers.
- Enter the Effective Start Date for the locker assignment.
- Enter an End Date for the locker assignment.
- Click the Schedule Lockers button. Once the wizard is finished, a report will display, listing which lockers were assigned and which student were not.
The following options can be selected on the Locker Schedule Wizard.
Option | Description |
|---|---|
What locker type would you like to schedule? | Select which Locker Type (Academic, PE, etc.) to assign to the students. Most lockers are set to Academic by default. |
What students would you like to schedule? | Select the students to schedule either by Grade level or an Ad hoc Filter.
|
Would you like to assign lockers designated for a particular grade level | Only those lockers designated for the selected grade level will be assigned if YES is chosen. Otherwise, the grade level selected on the lockers will be ignored (if NO is chosen).
|
How would you like to assign lockers to students? | Choose one of the following options from the dropdown list. If either of the boy/girl options are chosen, the wizard will assign one boy and one girl until one gender group has run out; at that time, it will assign the remaining gender group.
|
Should lockers be sorted in alphabetical or numerical order? | Determine if lockers should be sorted either alphabetically or numerically. If numeric is chosen, the locker number must contain ONLY numbers. |
Would you like to double assign lockers if needed? | If lockers are marked as Shared, more than one student can be assigned to it. If this is desired, mark Yes, double assign lockers if needed. |
What date would you like the enrollment/ locker assignment to begin? | Enter the Effective State Date of when the locker assignment should begin. Dates are entered in mmddyy format or can be selected by clicking the calendar icon. |
What date would you like the locker assignment to end? | If the locker assignment should have an end date, enter that date. Dates are entered inmmddyy format or can be selected by clicking the calendar icon. This date does not have to be entered at this time. However, the locker is considered unavailable until the student's locker assignment is ended. Typically you would enter the last day of school here. |
Individually Assign Lockers
Path: Student Information > General > Lockers
- The student Locker tab defines and stores the locker's number, serial number, combinations, type and location. Maintaining student locker information can be done on an individual student basis on this tab. This can be useful later in the school year when lockers have already been mass assigned and a new student arrives at your building.
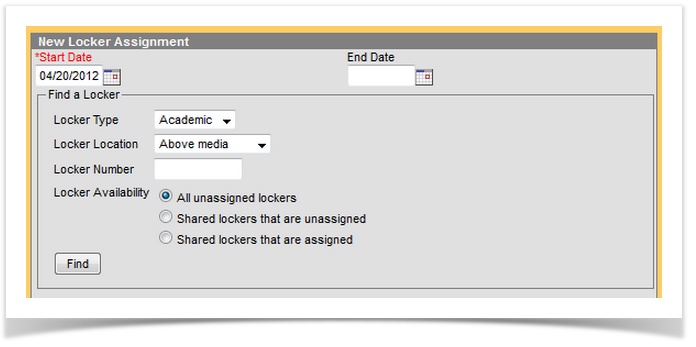
- When assigning a new locker to a student, a New Locker Assignment section displays. This section provides a searching functionality for the user to find a locker that meets the student's locker needs.
Field | Description |
|---|---|
End Date | Date the locker stopped being assigned. This date does not need to be entered at this time, but can be if the student will only be assigned the locker for a set date range (i.e., football season). |
Locker Availability | The search function will look for the selection type: |
Locker Location | Selection indicates where in the school building the locker is located. Locker locations are created in the Locker Location tool. |
Locker Number | The value (could be numeric or alphabetic) assigned to the locker for identification purposes. |
Generating Locker Related Reports
Path: System Administration > Lockers > Reports
Topic | Tool |
|---|---|
Generating a report showing assigned locker combinations and locker sequence | |
Generating a report listing students without assigned lockers | Students Without Lockers Report |
Generating a report of vacant lockers | Vacant Locker Report |
Generating Locker Related Reports
Path: Scheduling > Reports > Schedule Batch or Student Information > General > Schedule Tab
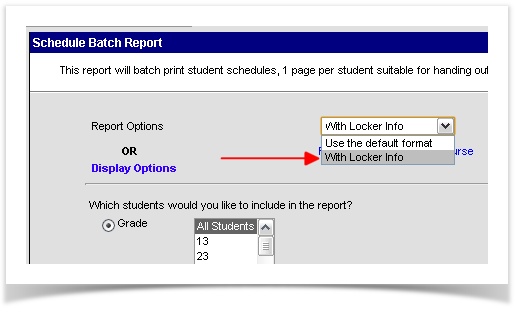
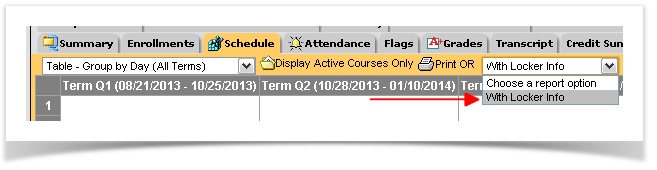
By default, the schedule report does not include the locker information on the students' schedules. In order to accomplish this, an additional option has been created on the Schedule Batch report called "With Locker Info". When you choose this option in the drop-list, the locker information will appear. This option is also available on the Schedule tab if you need to run for an individual student.

Importing New Lockers into Infinite Campus
If you have new lockers, or your school's lockers were never entered into Infinite Campus, they can be imported in one batch.
- Fill out the template spreadsheet with your locker information
- send it to campus@columbus.k12.oh.us (Subject: Locker Import)
- We will import the lockers for you
Related content
Department of Accountability & Other Support Services
Division of Information Management