When courses are rolled over from the previous school year, all sections of each course are also rolled over. This includes the teacher(s), room, and when the section is offered --period, day(s), and term(s).
A new section of a course can be created in a few simple steps:
| 1 | Make sure to select the correct school year (next year if you are building next year’s schedule) |  |
| 2 | Click the Search tab, and select Course/Section from the drop list | |
| 3 | Enter a course name or number and click the Go button | |
| 4 | Click on the Course name in the search results | |
| 5 | Click the Sections tab, then the Add a Section link | |
| 6 | Choose a section number. This must be a numeric value between 1-9999. IMPORTANT: Make sure to follow the section numbering guidelines here: Section Numbering Guide | 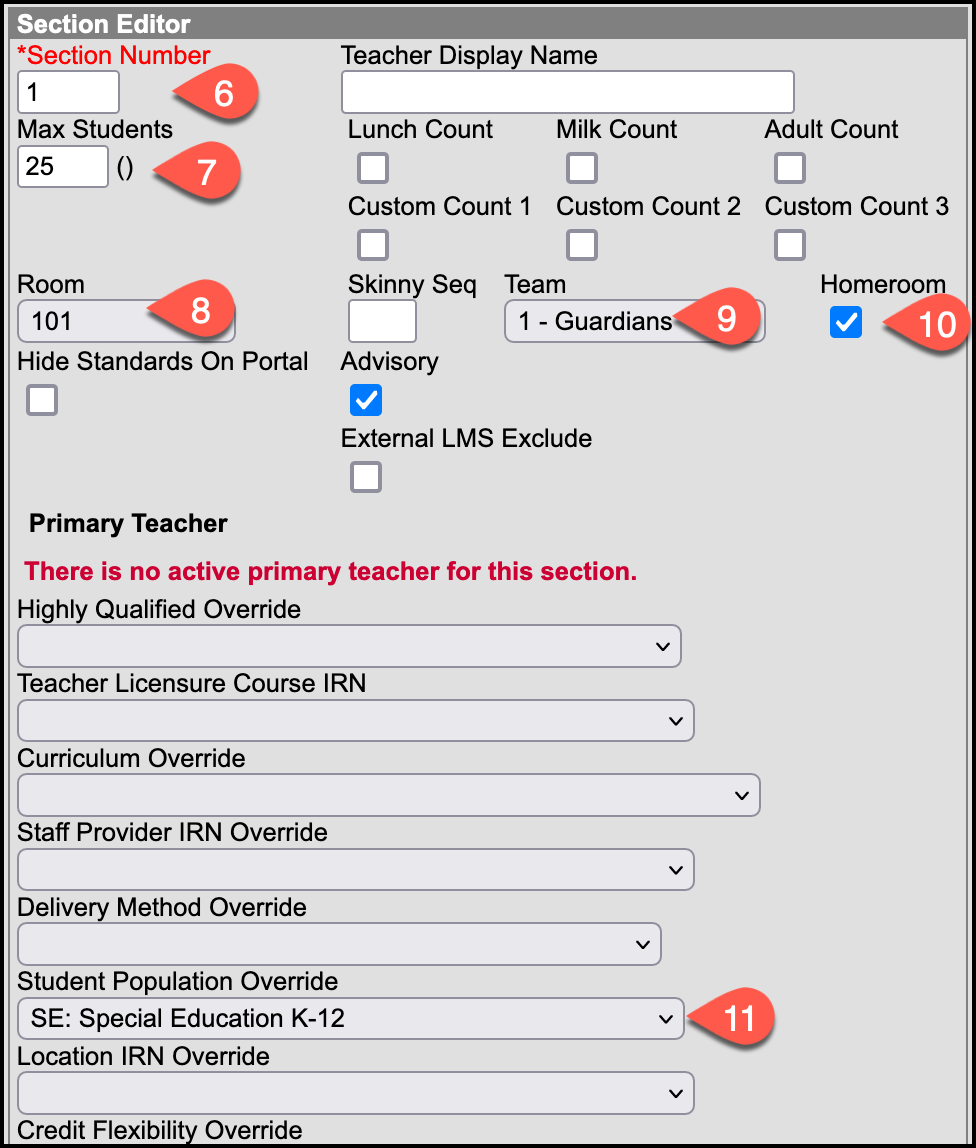 |
| 7 | OPTIONAL Add the maximum students that should be scheduled into this section by the Schedule Wizard. The number in parenthesis ( ) is the maximum value set for the course itself, and will be used if you do not enter a number here. | |
| 8 | Add the room number where this section will be taught. If you do not yet know the room number, this can be added later | |
| 9 | OPTIONAL If you are using teams to groups students into courses together, this can be set here. More information on Teams can be found here: | |
| 10 | OPTIONAL If this section is a homeroom (usually 1st period), check this box. If not, leave it empty. | |
| 11 | Only if this section is being utilized for a resource room, or when the roster is MOSTLY special education students, set the Student Population Override to SE as shown. Otherwise, leave the default setting | |
| 12 | Check the boxes that correspond to the period, days, and terms the course is being offered. Follow the Section Placement guide here: Section Schedule Placement |  |
| 13 | Click the Create Section button |