| Info |
|---|
When courses are rolled over from the previous school year, all sections of each course are also rolled over. This includes the teacher(s), room, and when the section is offered --period, day(s), and term(s). |
...
| 1 | Make sure to select the correct school year (next year if you are building next year’s schedule) | 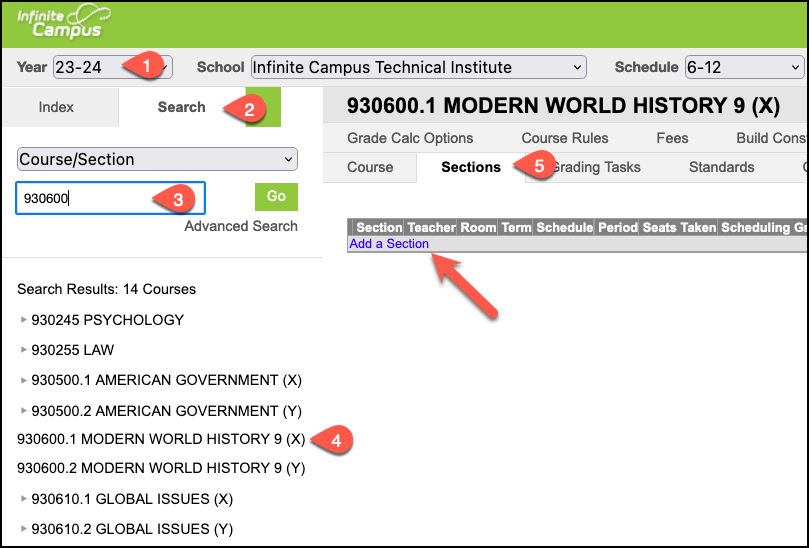 | |||||
| 2 | Click the Search tab, and select Course/Section from the drop list | ||||||
| 3 | Enter a course name or number and click the Go button | ||||||
| 4 | Click on the Course name in the search results | ||||||
| 5 | Click the Sections tab, then the Add a Section link | ||||||
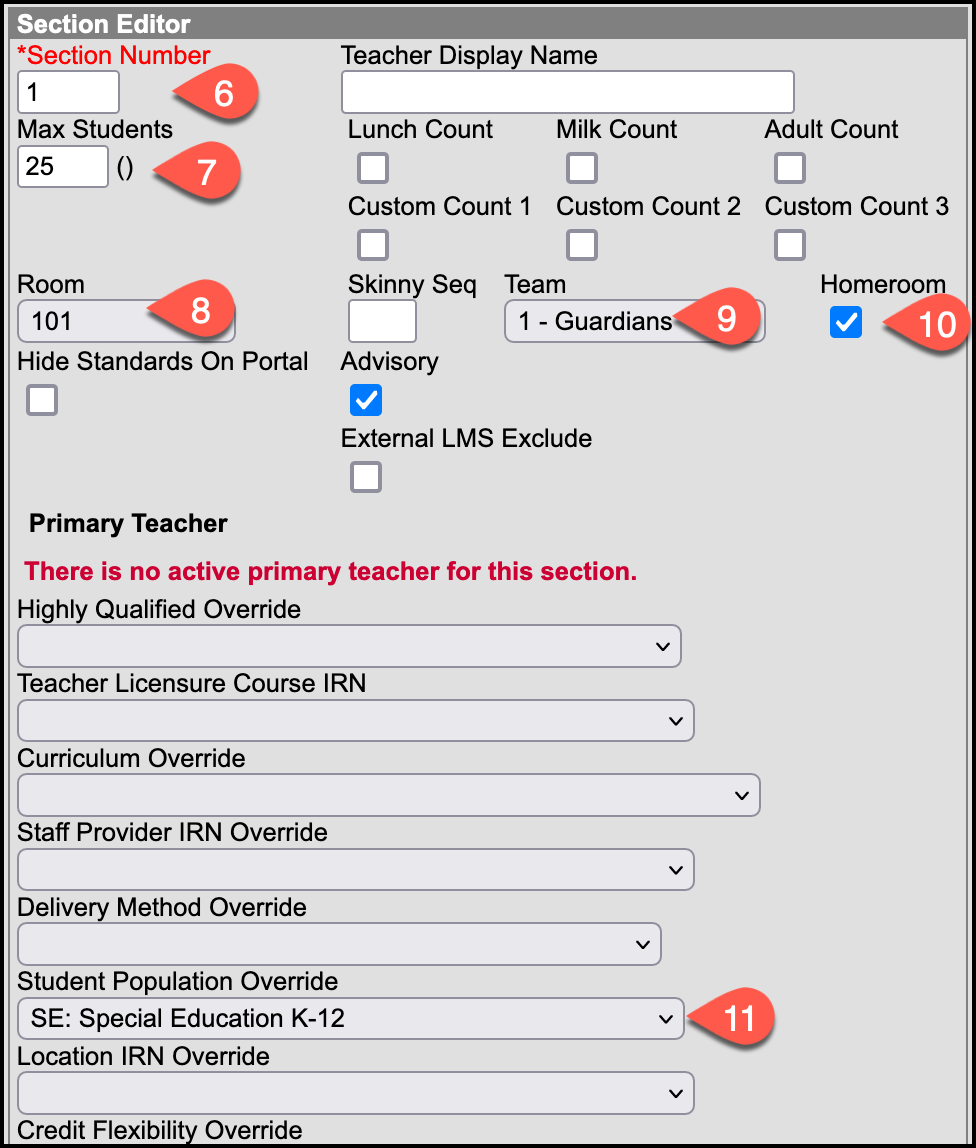
| 6 | Choose a section number. This must be a numeric value between 1-9999. *
|  | |||||
| 7 |
For Special Education resource rooms (sections 200 and higher), it is recommended to set this value to zero (0) so that the schedule wizard does not place students into these sections, allowing you to only add students one at a time. | ||||||
| 8 | Add the room number where this section will be taught. If you do not yet know the room number, this can be added later | ||||||
| 9 |
| ||||||
| 10 |
| ||||||
| 11 | Only if this section is being utilized for a resource room, or when the roster is MOSTLY special education students, set the Student Population Override to SE as shown. Otherwise, leave the default setting. This would apply to all sections with section numbers 200 and higher, per the Section Numbering Guide mentioned in step 6. | ||||||
| 12 | Check the boxes that correspond to the period, days, and terms the course is being offered. Follow the Section Placement guide here: Section Schedule Placement | 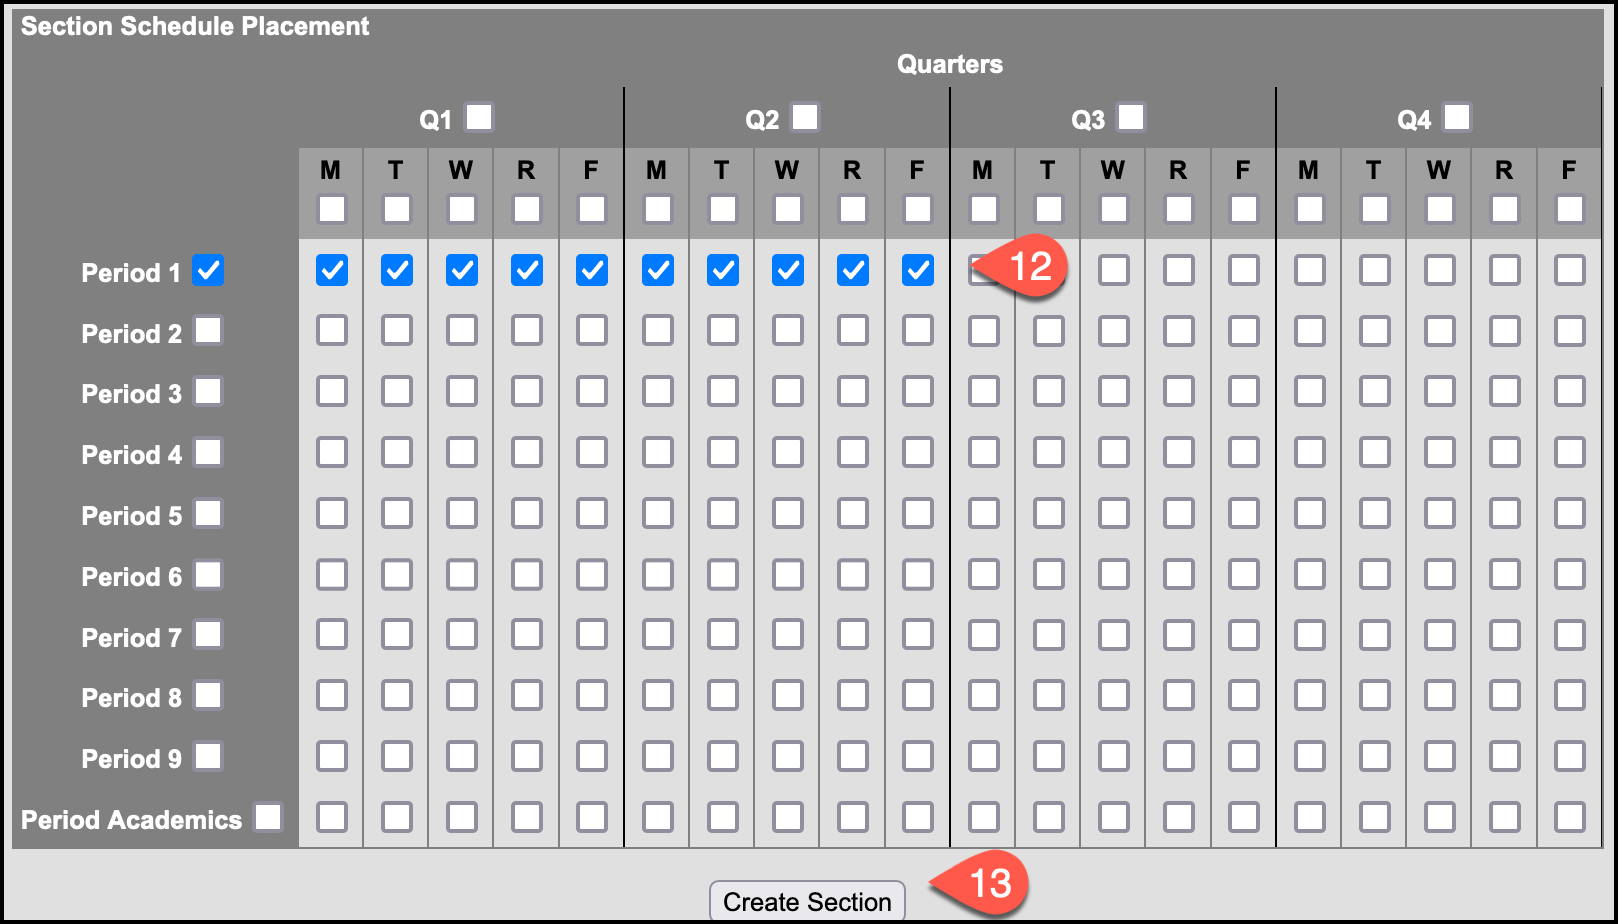 | |||||
| 13 | Click the Create Section button. This will complete the process for the initial creation of the section. Follow the steps below to add the teacher(s) to the section. | ||||||
| 14 | To add a teacher, click on the Staff History tab and choose New Primary Teacher. | 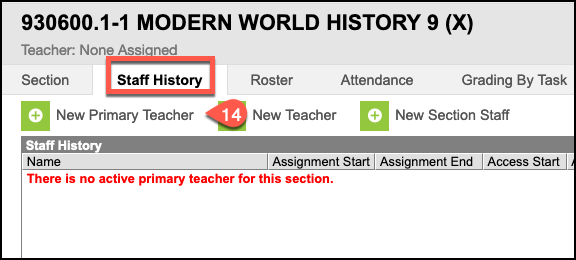 |
...