Correcting Attendance for all Errors Identified within 30 Days from the Date of Absence - Period Attendance
Guidelines for Verifying Proper Attendance Coding and Correcting Attendance Data
5200a - Guidance on Correcting Attendance Data Errors rev 9 16 16 EDITED 10 10 16.pdf
page break
Correcting Attendance for all Errors Identified within 30 Days from the Date of Absence -
Period Attendance
Any correction based on documentation received from a teacher, for a particular class/period, not daily attendance
Supporting documentation must be received from the teacher. This documentation must include the date and period that the teacher marked in error, what the error is, and the teacher signature and date they signed the documentation. This will be filed in the student's appropriate attendance file.
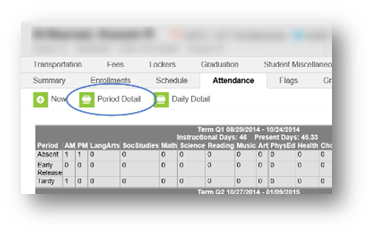
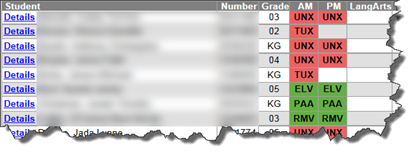
Print the student's period attendance detail report.
Make the correction
Staple the period attendance detail report and the supporting documentation from the teacher together and file the documentation in the appropriate attendance file.
Note: As long as this is only for a particular period, and not for daily attendance, and is within 30 days (29 days or less), no email notification is required to make correction.
Accessing the Students Attendance Tab
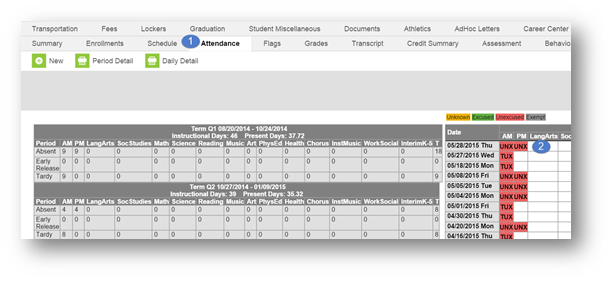
The Attendance tab can be used to edit or delete an attendance event.
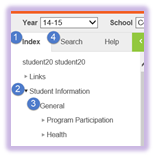
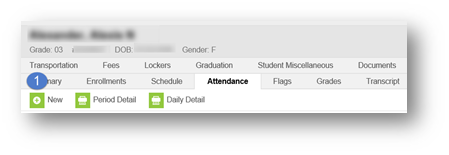
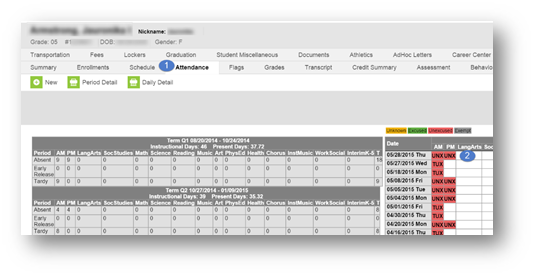
PATH: Student Information>General>Search for the student>Attendance tab
- Click the Index tab.
- Click Student Information.
- Click General.
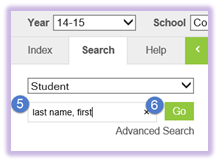
- Click the Search tab
5.Type in the student’s name to search for them.
6. Click Go.
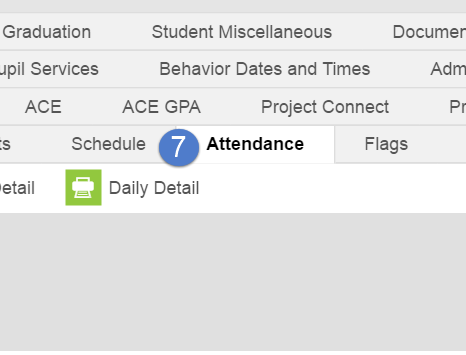
7. Click Attendance Tab
page break
Adding a New Event Using the Student's Attendance Tab
When the attendance office is notified in writing of an omission of an attendance event, i.e., a student believed to be present, was absent. The attendance event will need to be added. Please do not accept verbal notifications of errors.
Do not add Attendance connected to behavior events; this will create an exception on the Behavior Attendance Audit Report. This attendance must be changed in the Behavior Resolution.
page break
Editing an Attendance Code on the Attendance Tab
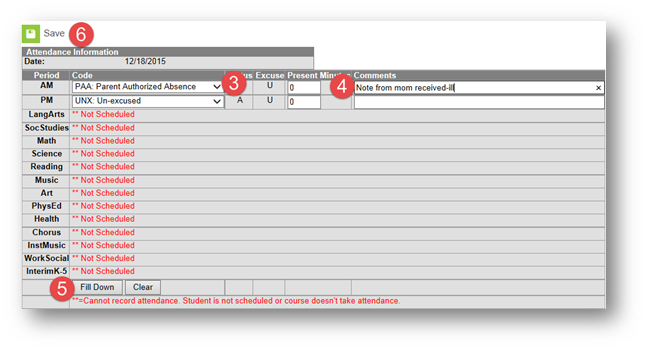
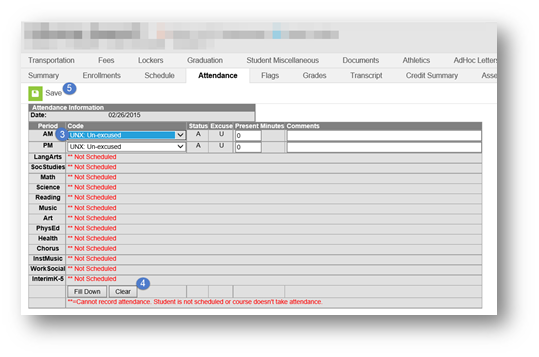
Attendance codes can be edited when a Board approved reason for the absence(s) is provided by the parent/guardian and/or professional provider within one week of the date of absence. Prior to excusing an absence verify that Principal approval is not required.
A Request for Principal Approval of an Excused Absence From must be completed when absence documentation is:
- Received after one week from the date of absence
- The student has reached an accumulation of 9 Parent Authorized Absences
- The reason for absence is not a board approved reason
- Student is traveling Out of the Country
- Vacations (must be pre-approved.
page break
Board policy expectations are for parent/guardians to notify their child’s school of the student’s absence by 9:30 a.m. The phone call is to be recorded on the Student Absence Notification form. The form, note from parent/guardian, or document from a professional provider, is used to edit the student’s absence, tardy, or early leave.
Reference the Attendance Codes document for a complete list of Attendance, definitions, and documentation needed.
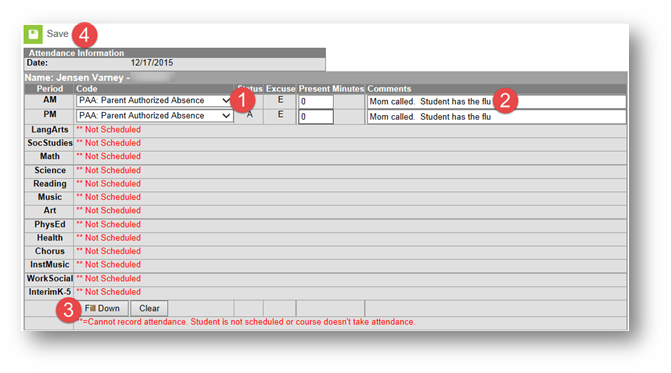
Unexcused absences from previous days should be edited to “PAA: Parent Authorized Absence” when a note is received from the parent that includes an excusable reason for the student’s absence, but lacks supporting documentation from an authorized source according to Board Policy. If supporting documentation is provided from an authorized source, i.e. medical professional, college visitation, court provided documentation, then the code would be entered as “EXC: Excused”.
page break
Deleting an Attendance Event
If an attendance event is recorded in error the office must be notified in writing of the error. The notification must include the students name, date of absence, and signature of staff member reporting the error (email preferred). Verbal notifications are not permitted.
Department of Accountability & Other Support Services
Division of Information Management
