| Info |
|---|
Campus Community Resources (not familiar with Campus Community? Details here.) 🎥 Video - Creating Seating Charts 🏗 Simulation - Creating Seating Charts 🖨 Documentation - Creating Seating Charts (with printable PDF link) |
🆕 Administrators, Secretaries, Counselors, and others with at least READ access to course sections can now view seating charts for contact tracing. Click here for instructions.
| Tip |
|---|
When Students move in/out of your classroom, you should create a new seating chart with a new date to reflect this. To learn how to copy an existing chart, click here. |
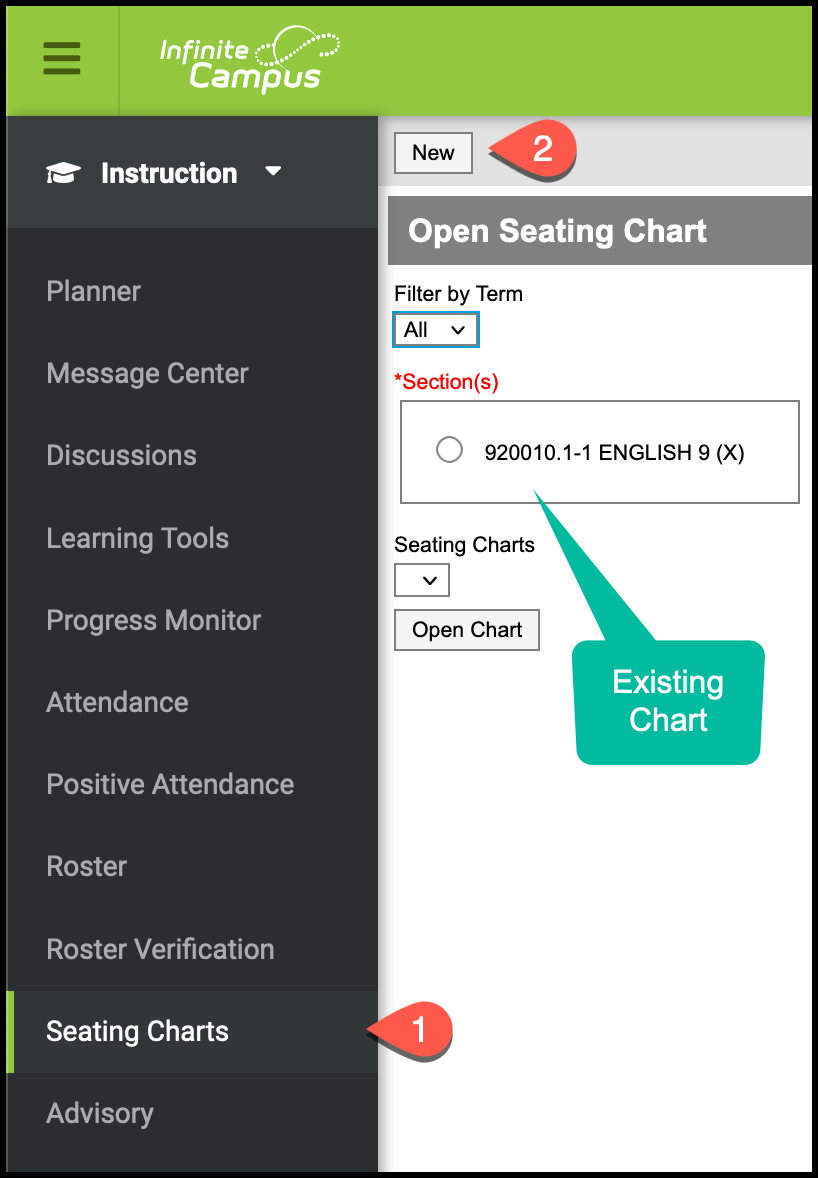
PATH:Campus Instruction > Seating Charts
Select the Seating Charts menu item
Click the New button at the top to create a new chart. Existing charts will be listed below.
Choose the course/section to create the chart for
Give the chart a name
 Be sure to add the date when this chart became effective for contact tracing.
Set the default layout with the number of rows/columns that best matches your room. These can be altered later.
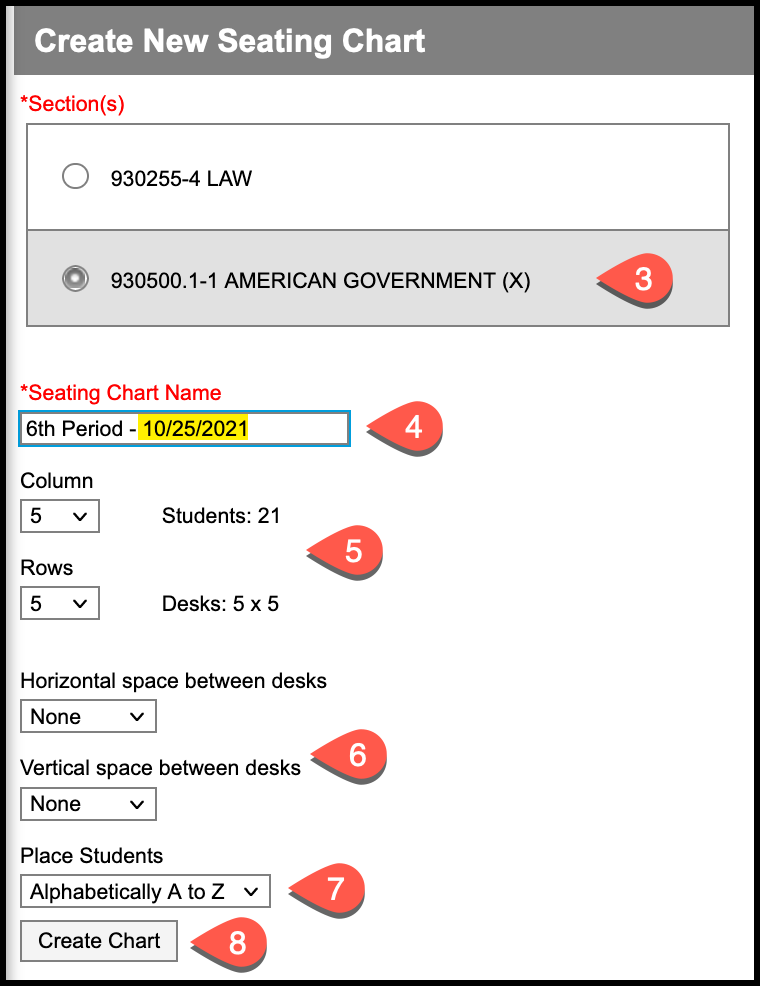
Set the initial spacing between desks. This can also be altered later.
Students can be automatically placed alphabetically or randomly by choosing one of these options. If you already have your students where you want them and wish to place them on the chart manually, choose the Do Not Place option here.
Click Create Chart
...