There will be students who need to have a photo taken before their ID can be printed. To add a photo to a student:
To add a photo for a student, click ‘Enter’ on the ID Print icon located on the Dashboard.
Find the student you need to take a picture for by using the ‘Search’ option.
Find the student in the results and click on ‘Edit’ to open the editing panel.

If you have a camera on your computer:
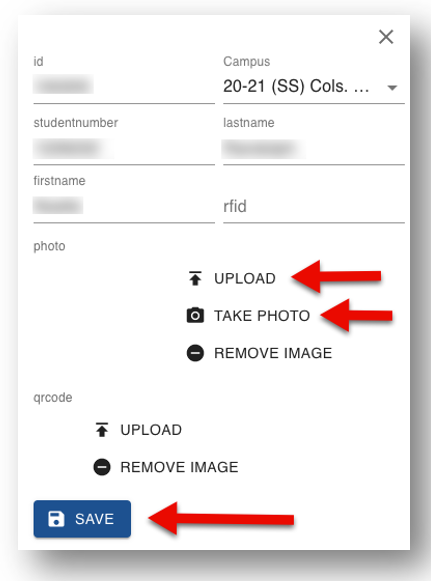
On the editing panel, select ‘Take Photo’. You may have a dialog box open asking for permission to use your camera. Click on ‘Allow’.
If you have a camera separate from your computer:
Take the students photo and save it on your computer. On the editing panel, select ‘Upload’ to upload the photo
Once the photo has been added to the student’s record on the editing panel, you must click on the ‘Save’ button to save the photo.