| Table of Contents | ||
|---|---|---|
|
...
| Info |
|---|
The instructions/screenshots below are for the New Look of Infinite Campus. For directions using the Classic Look of Infinite Campus, use the directions at the bottom of this page. |
Want to know more about the 👀 New Look? Click here.
New Look of Infinite Campus
PATH: MAIN MENU > ATTENDANCE OFFICE > REPORTS
THE ALL REPORTS WILL LOOK THE SAME FOR BOTH THE NEW AND CLASSIC LOOKS
Period Attendance Entry Step-by-Step
...
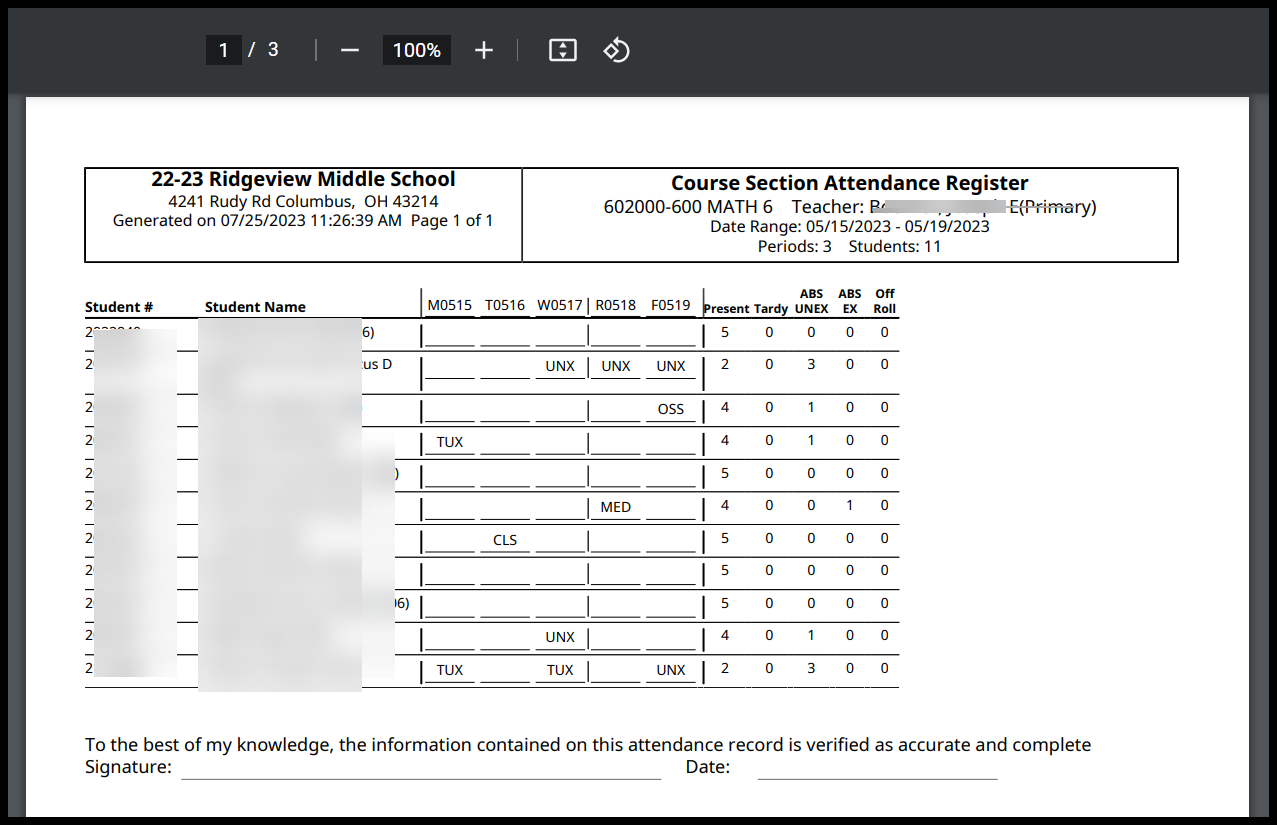
The report displays as shown. Please note that at this time, any attendance already entered in Infinite Campus for students will not display on the report.

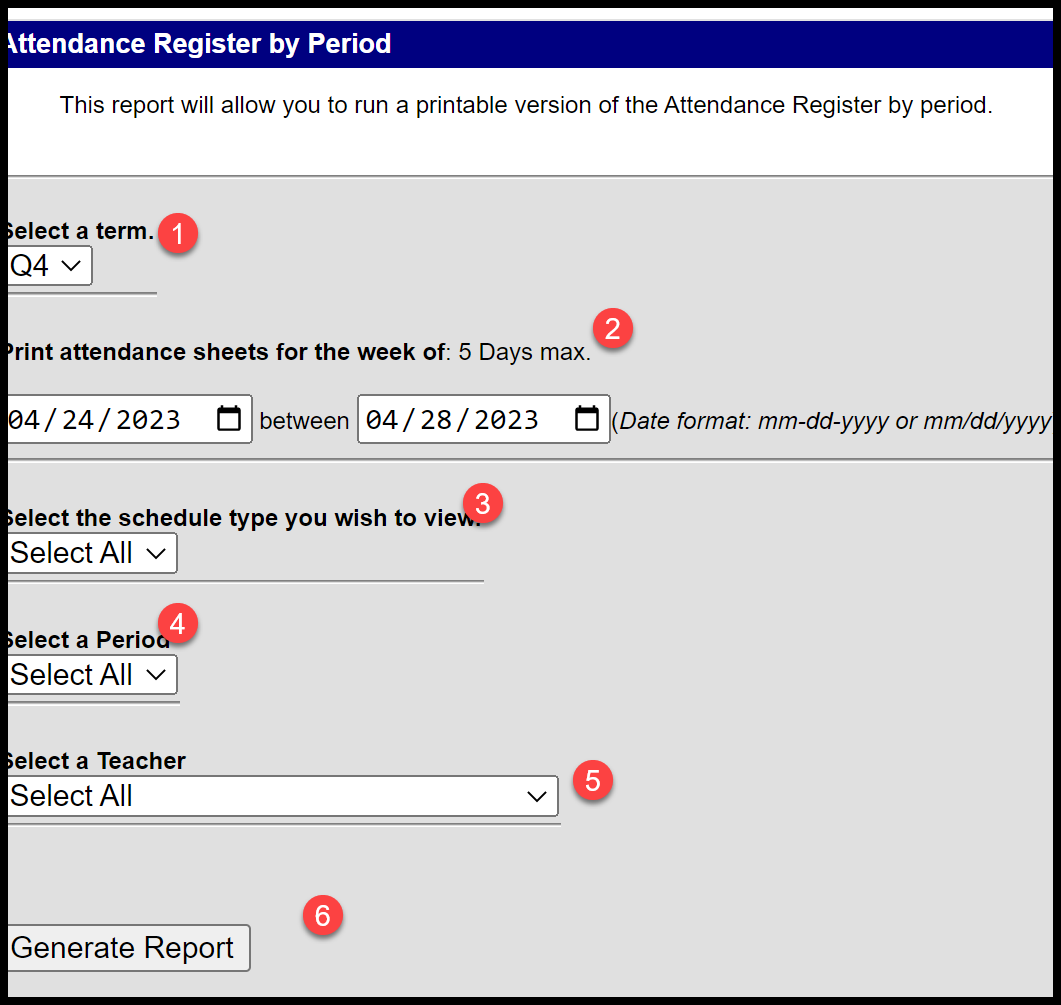
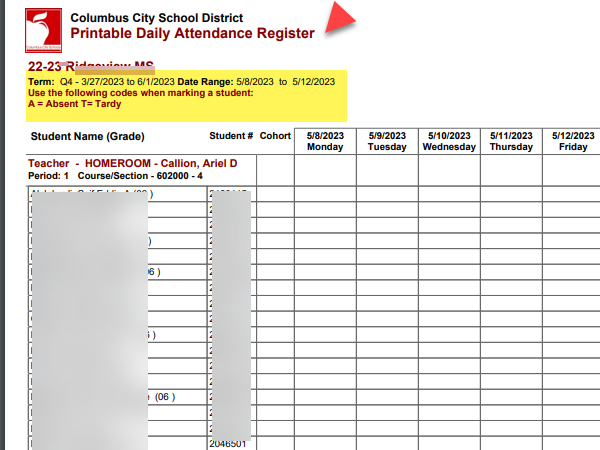
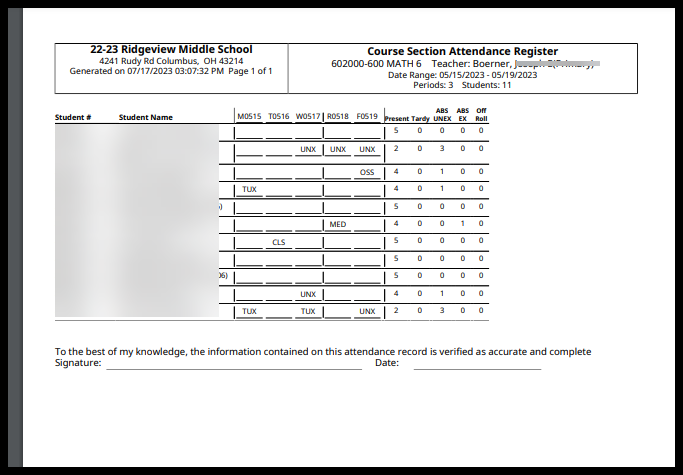
Attendance Register Report
...
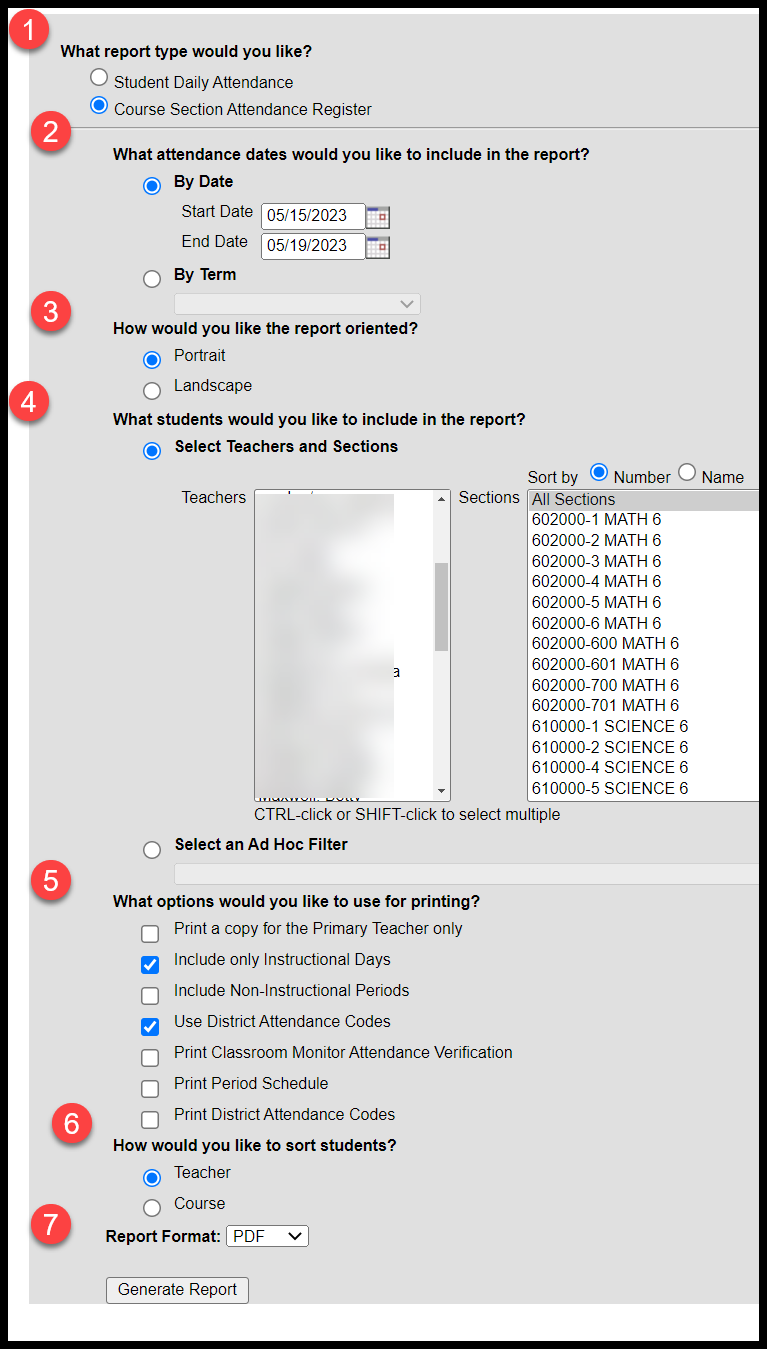
Select Course Section Attendance Register.
Select By Date: Enter the Start and End Date
How would you like the report oriented? Select Portrait
Select Teachers and Sections.
To generate for all classes for all teachers, leave at the default of All Teachers, All Sections Sort by name:
To generate the report for a particular course (ex: homeroom) highlight all of the Homeroom Attendance sections (if applicable). To Select multiple sections, click on the first section, click the shift key, hold the left mouse button, and scroll to the last attendance section.
What options would you like to use for printing?
Select Include only Instructional Days
Select Use District Attendance Codes.
How would you like to sort students?
Select Teacher or Courses
Click Generate Report.
  |   |
|---|
Page Break
Sub Attendance Roster
...
Effective Date defaults to the current date. The date can be changed by typing in another date or use the date selector. It is imperative that the date on the rosters is the date that the attendance is being recorded for
Period: Leave blank to generate the report for all periods.
Click on a specific period to generate the report for one period.
Use the CTRL key and left mouse button to select specific periods.
Teacher: Click on the name of the teacher the substitute is there for.
Use the CTRL key and left mouse button to select specific periods.
Click Generate Report.
Page Break
Step Two - Enter Classroom Attendance using Classroom Monitor
Enter the Infinite Campus generated paper roster received for a teacher who is subbing, for a teacher who does not have computer access or the computer is not working. The absences must be entered using the Classroom Monitor.
The Classroom Monitor will open to the current date.
To change the date, type the date or use the calendar tool to select the date. Click the Refresh button to reload the Classroom Monitor for the selected date.
Sections displaying as pink indicate that attendance has not been entered and saved
Sections displaying as green indicates that attendance has been entered and saved for that course. If all students are present, the teacher will still need to click on the section and click Save.
The number of student’s present displays with the number of students scheduled.
The teachers are listed in alphabetical order by last name. To the right of the teacher’s name, click on the course section. The screen opens to reflect the teacher view of attendance.
All students are Present by default. Mark the student’s absent by clicking the radio button under A or under T for Tardy. It is optional to enter comments in the Comments field in the Classroom Monitor. Comments entered here will display on the Portal. If all students are present, skip to Step 4.
Note NOTE: Do not enter tardy in the Classroom Monitor if the student was late to school. Only enter Tardies in the Classroom Monitor if the student was Tardy to Class.
Click Save. The page will refresh and display the Classroom Monitor view with the course section just modified in green.
...
| Info |
|---|
Attendance Taking Blocker CoursesStudents scheduled into Attendance Taking Blocker Courses must be marked absent daily in the classroom monitor. Attendance must be entered on the No Show, Unable to Locate and Located Not Attending blocker courses daily. For more information on these courses, visit the attendance blocker section of Attendance Basics 18-19 - ARCHIVE |
Page Break
Step Three - Verify Classroom Attendance Has Been Entered
...
Throughout the day, check the Classroom Monitor for completion of attendance for courses.
Use the scroll bar see all classes
Sections appearing in pink indicate that attendance has not been taken for that course. Sections appearing in green indicates that attendance has been entered for that course. Notice that the number of students present displays with the number of students scheduled into a course.
Hover over the course to view the course number, section number, the course name, and the room number.
For a printable list of teachers who have not entered attendance Generate an Incomplete Teacher Attendance report Break
...
Page Break
Step Four - Late Arrivals
...
| Note |
|---|
The good news is that a student does not have to be marked absent before entering the late arrival! |
...
Page Break
Step Five - Tardy to Class
...
You attempted to contact the home number but there was no answer. Record the date you called and state "no answer".
The student was marked Absent Unknown (A) before mom called in that the student would be out ill. Record "parent called in".
Page Break
Step Seven - Editing Attendance Reasons
...
Select the Attendance code from the drop-down list.
Enter a Comment - CCS requires a comment to be entered when an excused code is used.
Click Fill Down (Note: Do not use the Fill Down feature if there is not an absence entered for every attendance period.)
Click Save at the top of the tab.
...
Page Break
Step Eight - Students Leaving Early
...
Date: defaults to the current date, but can be changed by typing in the date or using the Date Selector
Mode: Select Batch
Students: Search for the student by name.
Click Search
The Search results will appear in Columns B and C if you search for an individual student. If you search for multiple students, you must click on their name in Column B to move them to Column C, after each search.
Enter the appropriate attendance code based on documentation on the Student Early Leave Log and/or documentation from the parent.
From Date is the date of the early leave; From Time is the time the student signed out.
To Date is the date of the early leave; To Time is the time school ends for the day.
It is required to enter the leave time and a comment in the Comments field.
Comments Options: Append comments
Leave Overwrite Existing Data checked.
Click Save Attendance.Enter
Enter Early Leaves no later than the following school day.
...
Page Break
Step Nine – Filing and Storing Attendance Notes and Documents.
...