| Table of Contents | ||
|---|---|---|
|
...
| Info |
|---|
The instructions/screenshots below are for the New Look of Infinite Campus. For directions using the Classic Look of Infinite Campus, use the directions at the bottom of this page. |
Want to know more about the 👀 New Look? Click here.
New Look of Infinite Campus
PATH: MAIN MENU > ATTENDANCE OFFICE > REPORTS
ALL REPORTS WILL LOOK THE SAME BOTH THE NEW AND CLASSIC LOOKS
...
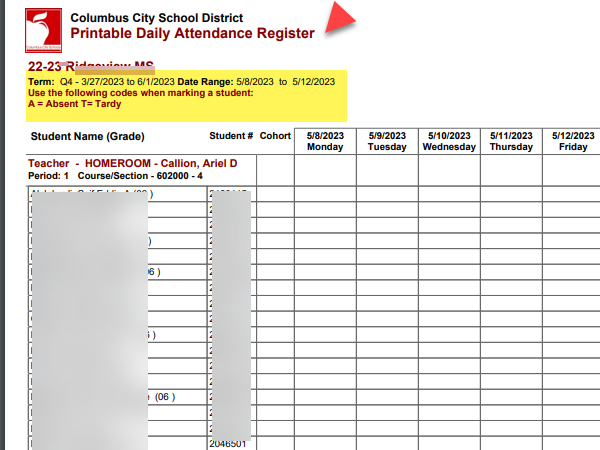
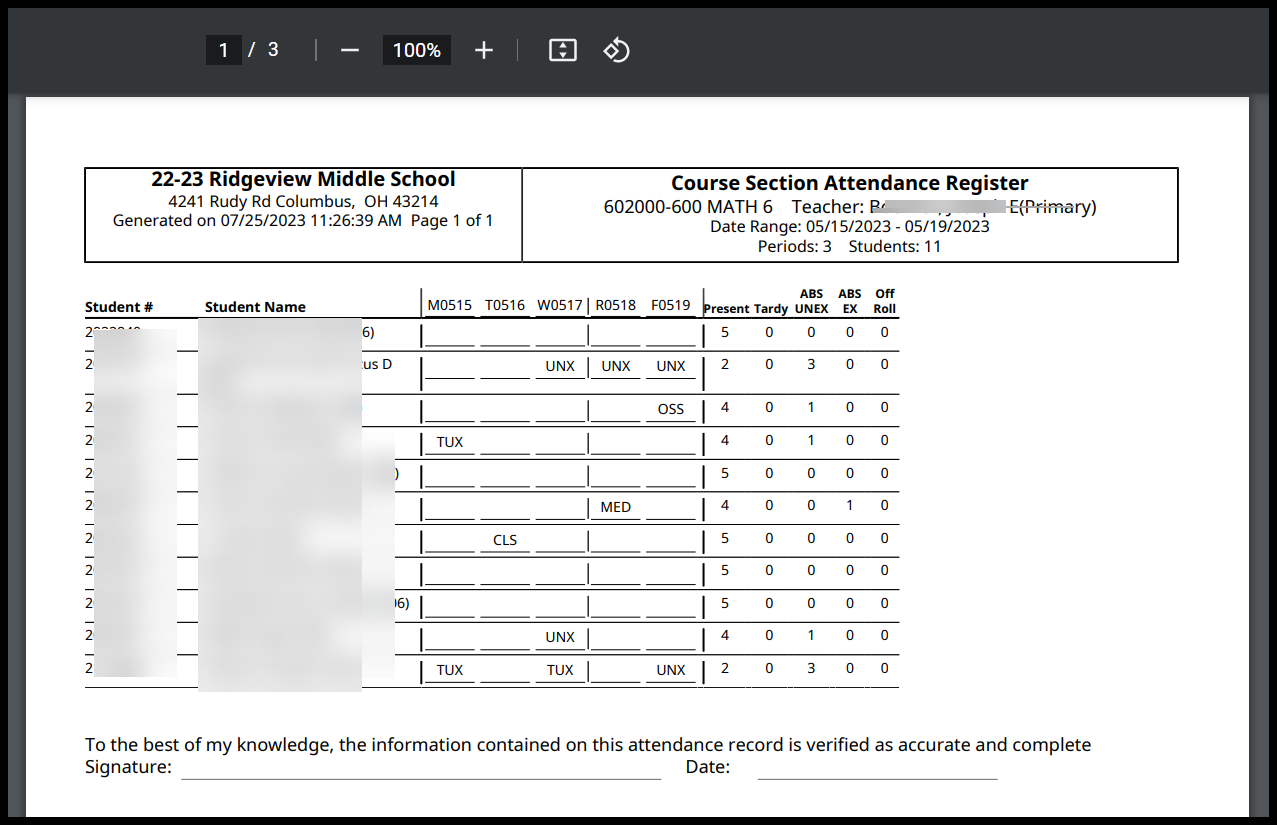
The report displays as shown. Please note that at this time, any attendance already entered in Infinite Campus for students will not display on the report.

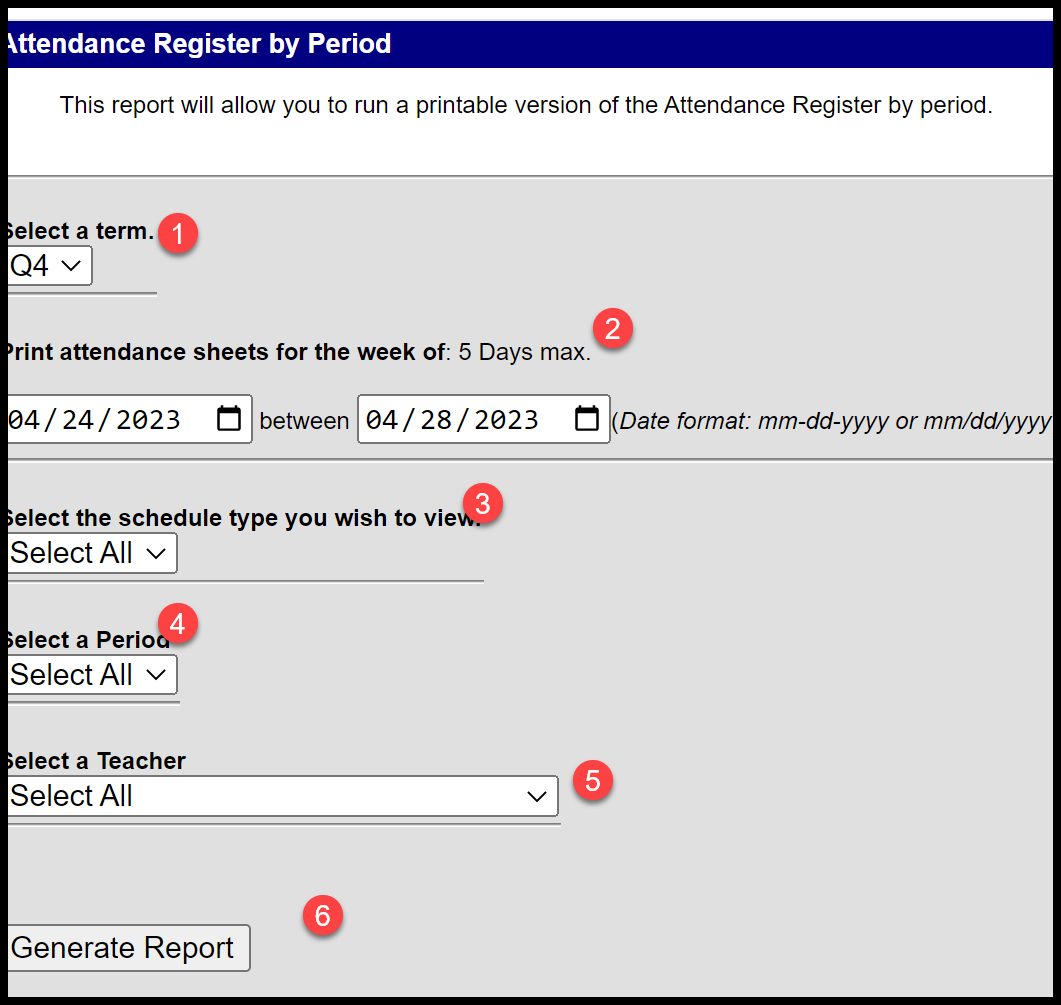
Attendance Register Report
...
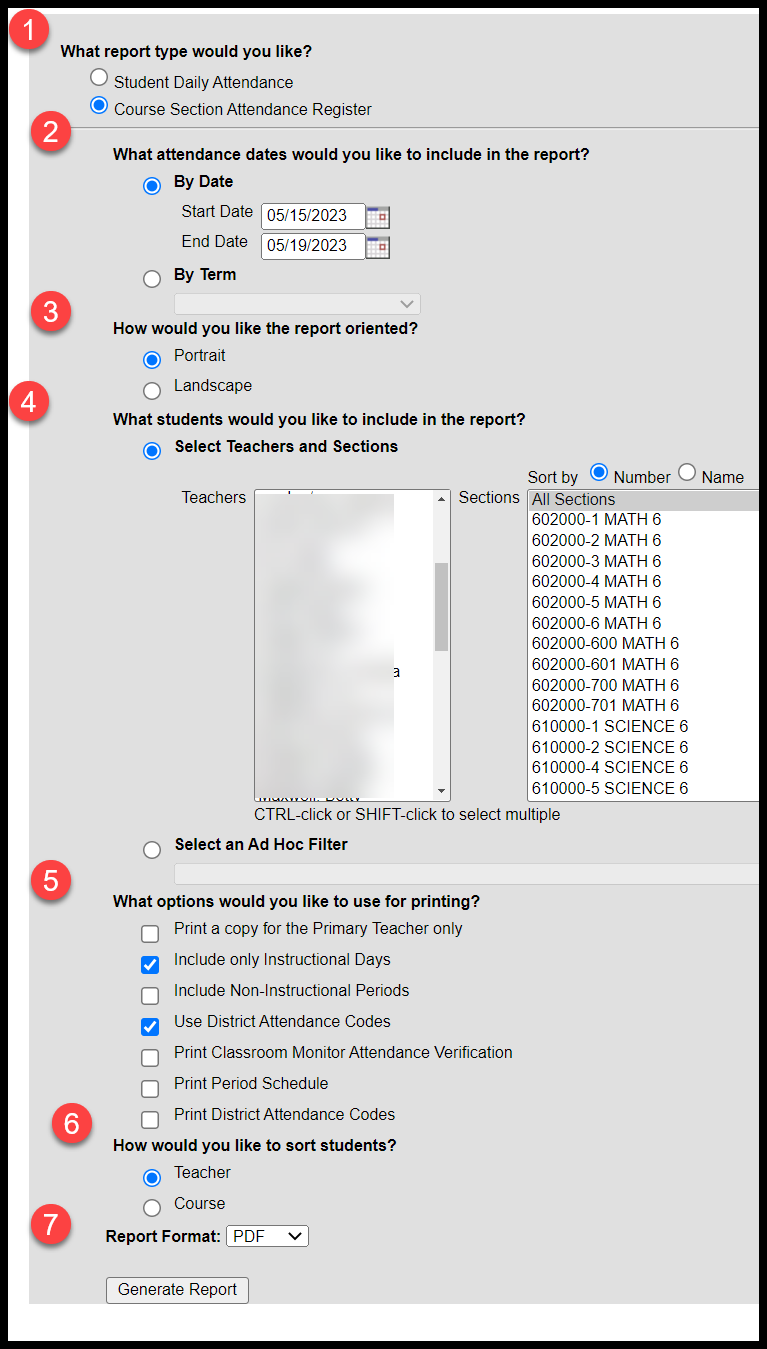
Select Course Section Attendance Register.
Select By Date: Enter the Start and End Date
How would you like the report oriented? Select Portrait
Select Teachers and Sections.
To generate for all classes for all teachers, leave at the default of All Teachers, All Sections Sort by name:
To generate the report for a particular course (ex: homeroom) highlight all of the Homeroom Attendance sections (if applicable). To Select multiple sections, click on the first section, click the shift key, hold the left mouse button, and scroll to the last attendance section.
What options would you like to use for printing?
Select Include only Instructional Days
Select Use District Attendance Codes.
How would you like to sort students?
Select Teacher or Courses
Click Generate Report.
  |  |
|---|
Page Break
Sub Attendance Roster
...
The Classroom Monitor will open to the current date.
To change the date, type the date or use the calendar tool to select the date. Click the Refresh button to reload the Classroom Monitor for the selected date.
Sections displaying as pink indicate that attendance has not been entered and saved
Sections displaying as green indicates that attendance has been entered and saved for that course. If all students are present, the teacher will still need to click on the section and click Save.
The number of student’s present displays with the number of students scheduled.
The teachers are listed in alphabetical order by last name. To the right of the teacher’s name, click on the course section. The screen opens to reflect the teacher view of attendance.
All students are Present by default. Mark the student’s absent by clicking the radio button under A or under T for Tardy. It is optional to enter comments in the Comments field in the Classroom Monitor. Comments entered here will display on the Portal. If all students are present, skip to Step 4.
Note NOTE: Do not enter tardy in the Classroom Monitor if the student was late to school. Only enter Tardies in the Classroom Monitor if the student was Tardy to Class.
Click Save. The page will refresh and display the Classroom Monitor view with the course section just modified in green.
...
| Warning |
|---|
TARDIESIf a student arrived to school on time, but was late getting to class, the teacher may mark the student with a "T" if they are just wanting to indicate that the student was late to their class. The Tardy Unknown will then be changed to a TTC: Tardy to Class using the Attendance Wizard. |
| Info |
|---|
Attendance Taking Blocker CoursesStudents scheduled into Attendance Taking Blocker Courses must be marked absent daily in the classroom monitor. Attendance must be entered on the No Show, Unable to Locate and Located Not Attending blocker courses daily. For more information on these courses, visit the attendance blocker section of Attendance Basics 18-19 - ARCHIVE |
...