...
| Table of Contents |
|---|
Filter Types
There are three different ways to create hoc filters in Infinite Campus:
Query Wizard
This is the most commonly used tool for creating filters.
Selection Editor
This tool can be used for manually selecting specific students to include in your filter
Pass-through SQL Query
This method allows you to be very specific by utilizing Structured Query Language (SQL) to query the database. This tool is more advanced and requires knowledge of the database and SQL.
Data Types
There are also three categories of data that you must select from when creating your filter.
Student
This data type is for filters that require specific student information (name, ID#, grade, etc.). Data is pulled from the calendar selected in the Campus Toolbar at the top of the screen.
Census/Staff
This data type is for filters looking for any person in the database (parents/guardians, staff, etc.). Data is pulled from the entire database, not just the calendar selected.
Course/Section
Use this data type if you need to filter on scheduling information like courses, sections, roster size, etc. Data is pulled from the calendar selected in the Campus Toolbar at the top of the screen
...
Query Wizard
...
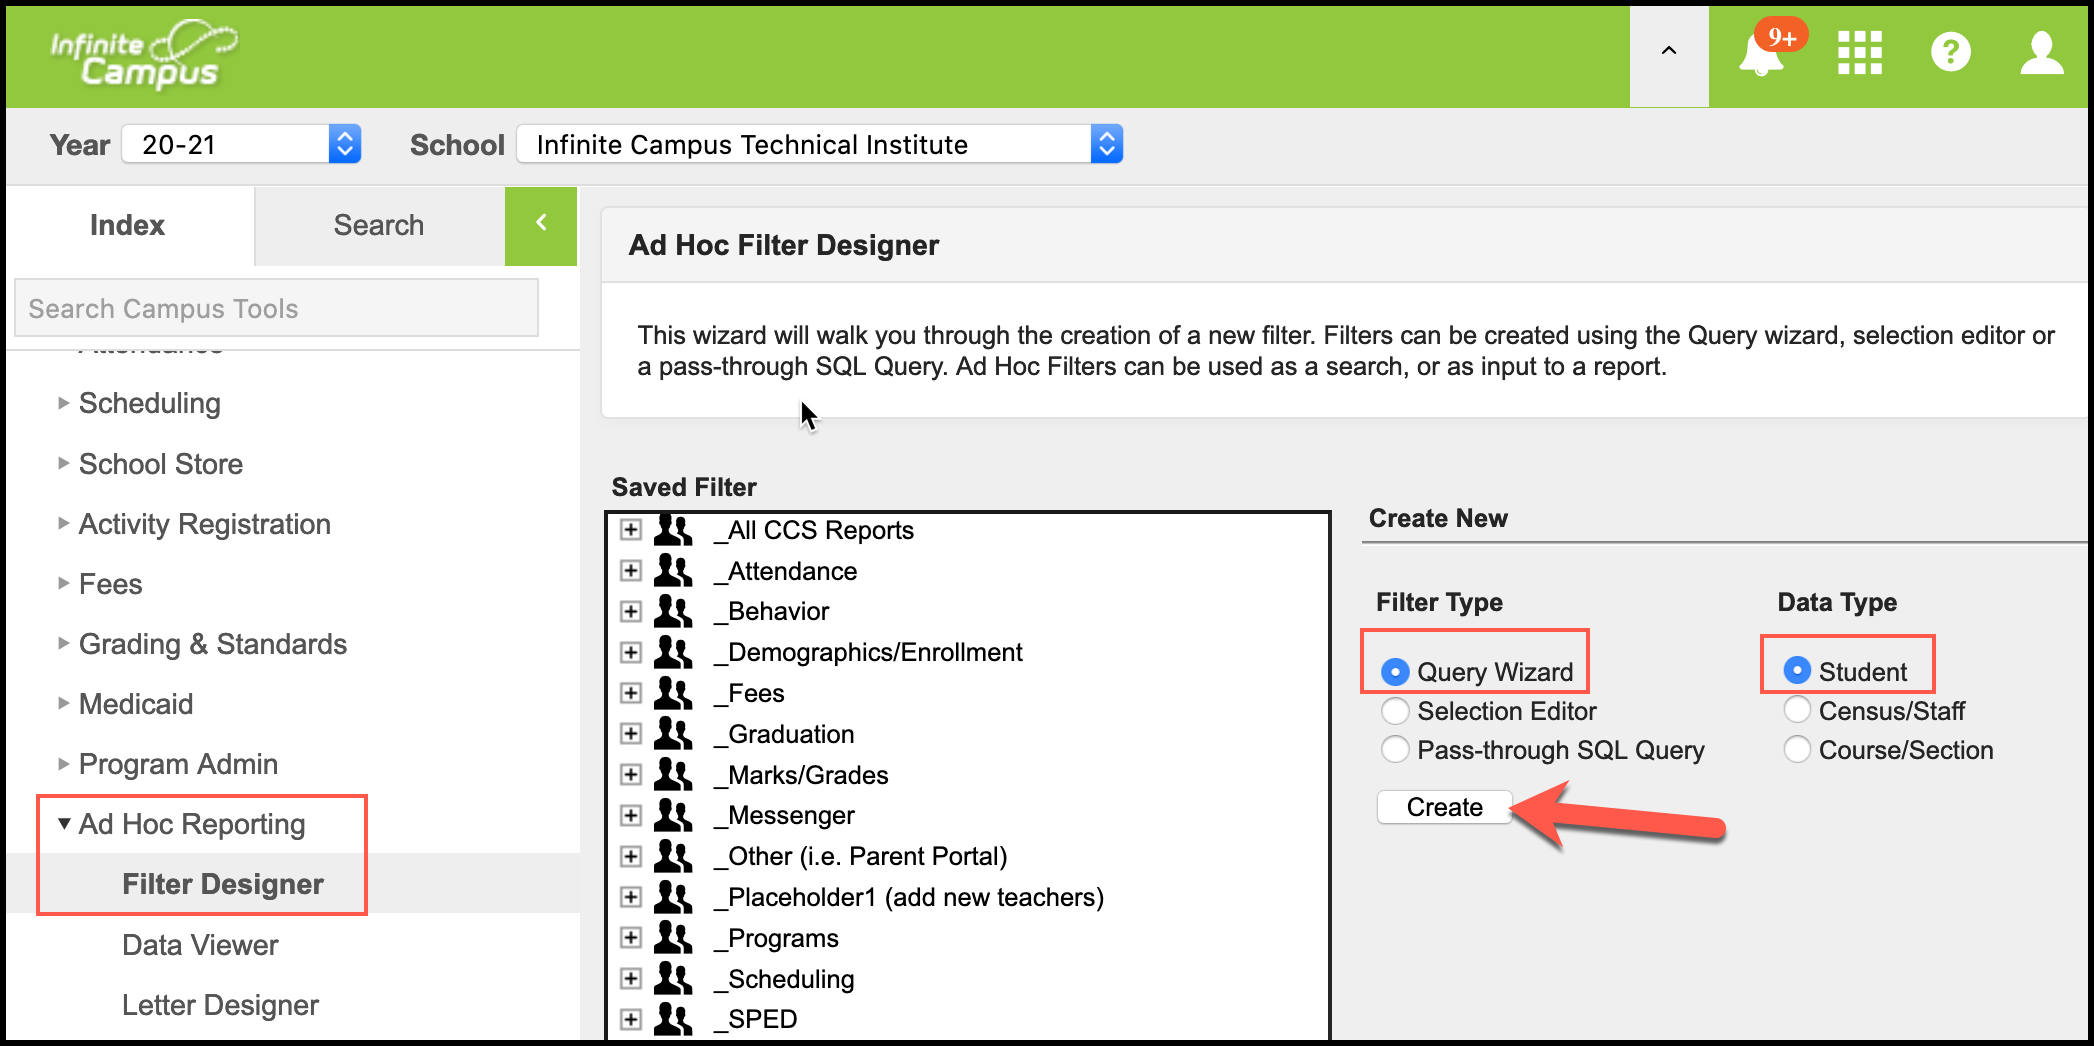
Open the Filter Designer, using this path: Index > Ad Hoc Reporting > Filter Designer
Click Filter Type: Query Wizard
Click Data Type: Student
Click Create.
Query Name: Name the Ad Hoc filter to know what data is being included. This field is required
Short Description and Long Description are optional but recommended
Select which fields to include in your filter by clicking the + symbol to the left of the category to expand the selection. Click on the field to move it to Selected Fields column.
In the example on the right, we expand the Demographics category to select the studentID, name, birth date, and grade.
| Tip |
|---|
Don’t be concerned about the order of the fields here, this can be adjusted later. |
If you are not sure where to find a particular field, you can search for it using the Filter By search box.
...
.
...
For example, if we wanted to only include active students in our filter, we can search for the word ‘active’
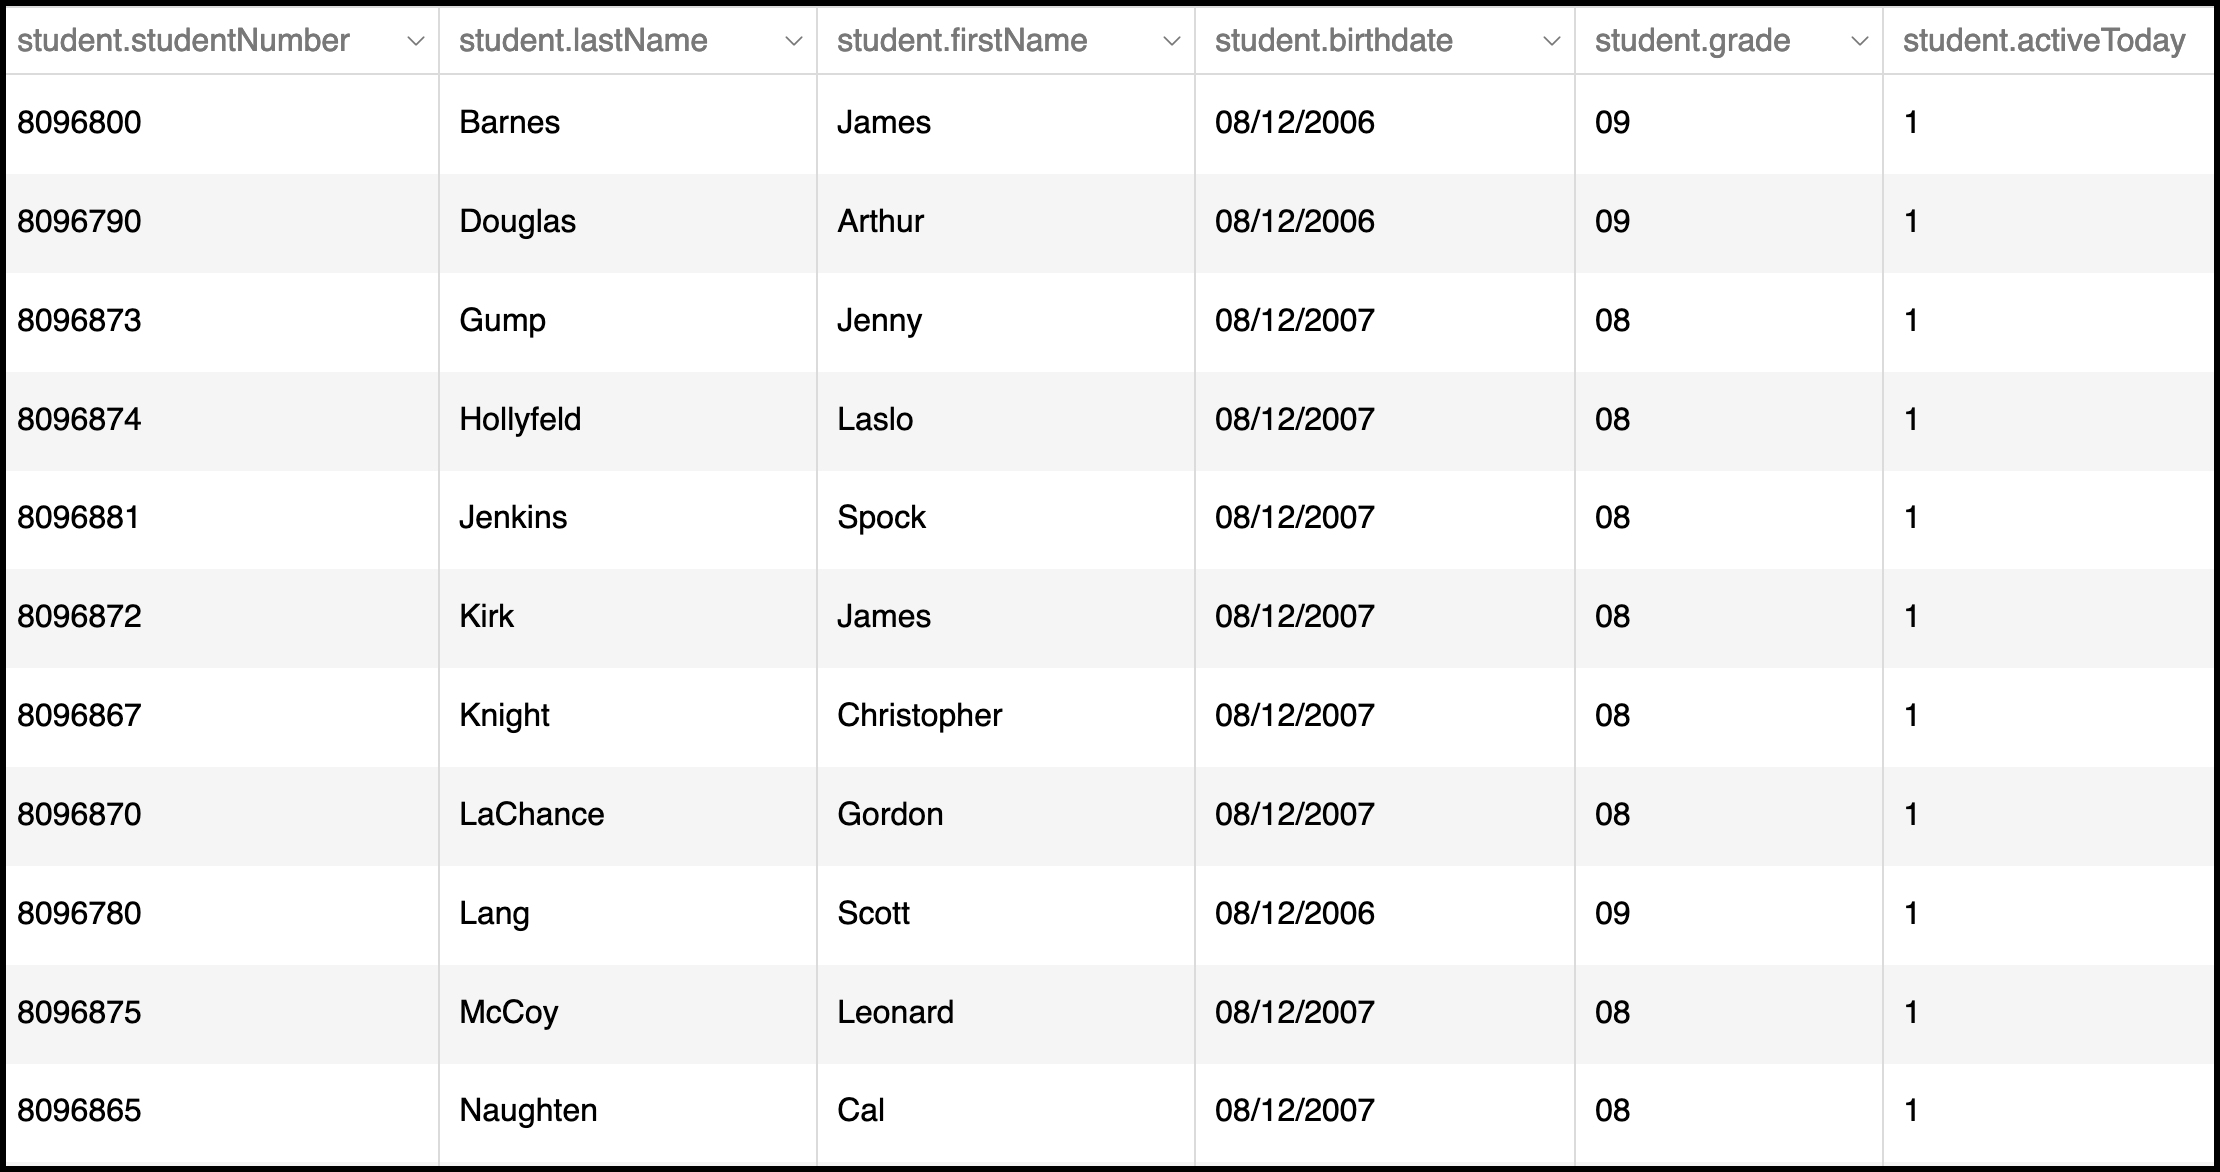
At this point, you can click on Save & Test to see what data that will be generated by the selected fields.
Once you have verified you are getting the type of data you want, click Next.

Filter the Data (Optional)
While this is an optional step, it is one of the most powerful tools to ensure that you get the exact data that you need.
Each field you selected shows on a line by itself. You can apply an Operator to that field and corresponding Value to narrow down your results.
In our example, we want to only include students with a birthday in August, and only include students who are Active today.
For birth date, choose IN THE MONTH OF from the operator list, then type in August in the value field
For ActiveToday, select =TRUE
| Info |
|---|
Note that the drop-list for operators changes depending on the type of data being evaluated. |
If you add operators and values, they are all considered equally when the database is queried. This means that ALL conditions must be true for data to be returned.
In our example, this means that:
Student has a birth date in August AND
Student has an active enrollment today
What if we wanted to narrow this down to specific grade levels?
The Logical Expression box can be used to combine options to get specific data like this.
For example, if we only wanted grades 8 and 9 returned:
Select student.grade = 08 (NOTE: All grade levels are 2 digits in our database)
Add another line by clicking the Add button, and choosing student.grade = 09
In the logical expression box, type in the statement 5 or 7. These are the ID numbers that identify the field you are talking about
If we still want to include the August birthdays and active students in our filter, we need to add these lines to the logical expression as well. It should look something like this: 4 and 6 and (5 or 7). This means that lines 4 and 6 must be true, and either 5 or 7 must also be true
You can click Save & Test at the bottom of the screen to make sure you are still getting the data you expect
Click Next to move to the next screen
...
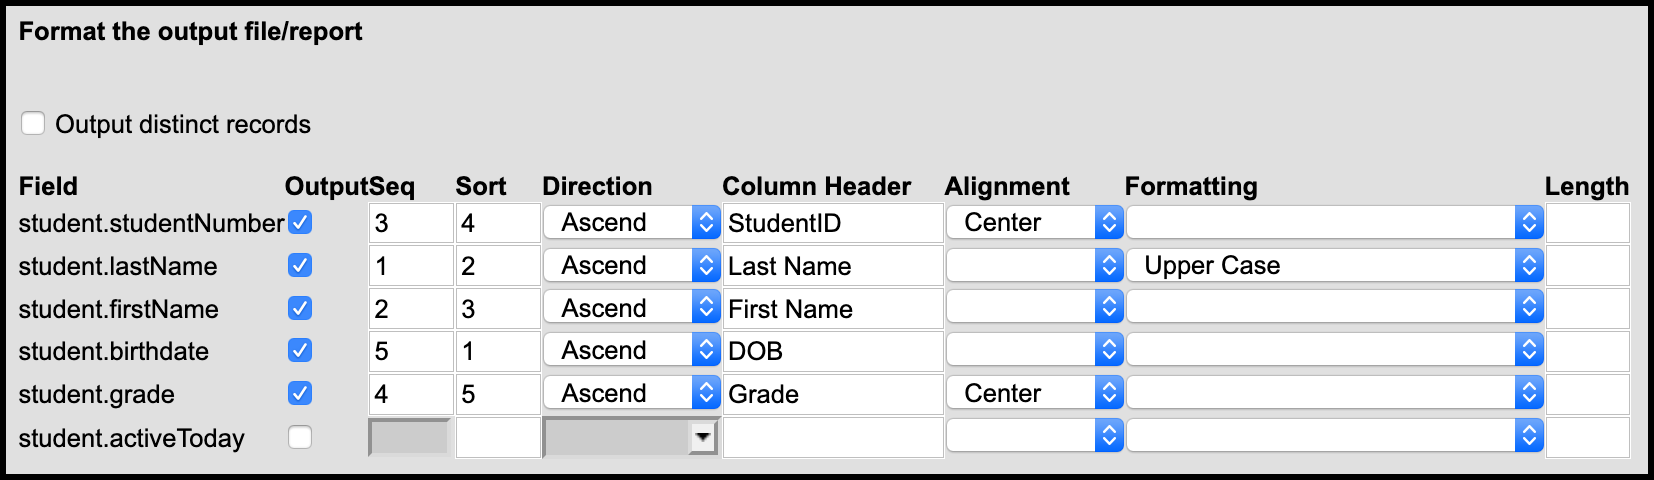
Format the Output File (Optional)
At this point, your filter is complete. Now we can decide how to present the information in a report.
Output - this determines if the data will display on the report. In our example, we know all of our students are active, so there is no reason to display this field. Uncheck the box to hide.
Seq - short for “Sequence”, this determines the order in which the fields appear across the top of the report. In this case, we changed it to have the student last name appear in the first column, followed by the first name.
Sort - this is the order in which the data is sorted. In the example, we sorted by birthdate, then last name, first name, student ID, and finally grade.
Direction - used in conjunction with Sort, this determines whether the data is sorted Ascending (A-Z or low to high for numbers/dates) or Descending (Z-A or high to low).
| Tip |
|---|
You do not need to fill out all of the boxes for Seq and Sort - only those you wish to order. The others can be left blank. |
Column Header - The column name can be changed by entering a new name in the Column Header column. This is often used to shorten the name
Alignment - the data can be aligned in the center, left, right.
Formatting - the options here will vary depending on the data type. For example, text fields can be made all upper case.
Length - If you want to limit the length of the output, enter a number of characters here.
Click Save or Save & Test at the bottom of the screen.
Click Next to move to the next screen.
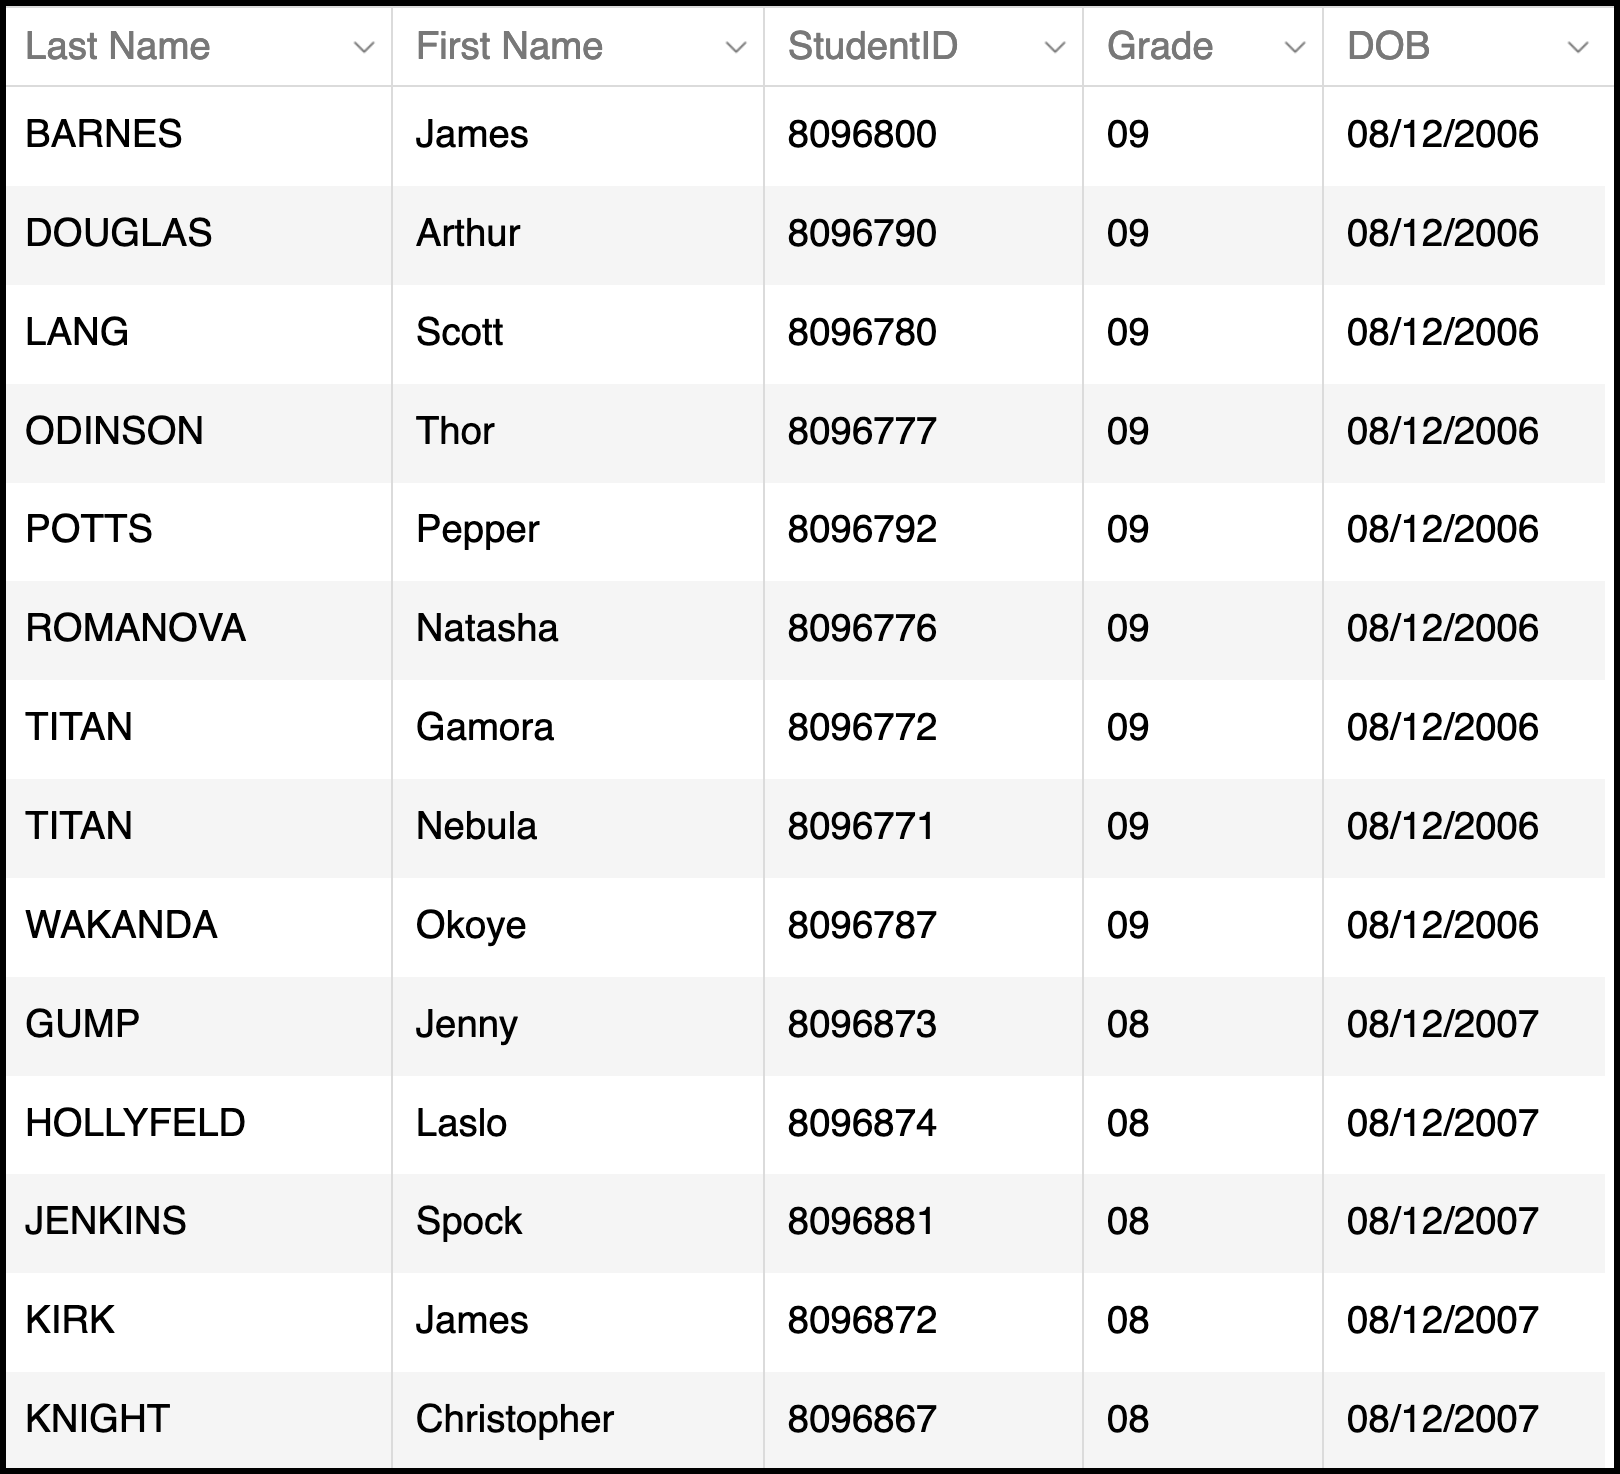
Before formatting:
After formatting:
Grouping and Aggregation (Optional)
The Grouping and Aggregation editor allows users to group fields into sections and report specific aggregates/sub-totals for each section.
...